First off, I would like to thank CrustyFN for his assistance in helping me put this thread together. I may be posting it, but I am giving credit where credit is due.
This thread is for all those out there that have given bullet casting a thought, but for some reason decided not to take the plunge. It is also for the expert casters out there...it never hurts to see how others cast...you may just learn something!! So here it is...and CrustyFN and I hope that you can use it!
Books to read
There are a couple good reads for learning the art of casting boolits. Lyman has a good casting manual titled Cast Bullet Handbook as does Lee (Modern Reloading by Richard Lee [has 1 chapter on casting]) and the ABC’s of Reloading also has a chapter on casting.
How do I get lead??
Tire shops. This lead is in the form of wheel weights. Wheel weights are used to balance your tires when mounted on the rims. The wheel weights actually clip on the rim….and most tire shops do not reuse them. So, when they change a set of tires, they pull off the old wheel weights and put new ones on. These dirty, grimy, hunks of lead are like gold to casters. They are a great alloy for low to mid range handgun loads. This is the easiest way to acquire lead, in my opinion. Some tire shops will want some money for the used Wws. I have heard of people paying between free and $1 a pound. A dollar is really high and I would never pay it…..but you may have to. Even at a dollar a pound you can still save quite a bit of $$$. Do the math…7000 grains in a pound. (200 grain .45 acp boolit= about 35 boolits per pound….so about $3 for 100 boolits! Chaching!) If you get a good deal or even free wheel weights, remember to take care of the guys. Beer, dougnuts, whatever it takes to keep them happy and generous with their lead!
Safety
Lead can be very dangerous. With a few safety measures, casting lead bullets can be very safe and enjoyable. A couple “common sense” safety tips: 1.) Lead is poisonous to humans. Anytime you handle lead, be sure to wash your hands and anything that has come in contact with the lead or lead fumes from casting/smelting. Do not eat while handling lead. 2.) Lead fumes are dangerous. ALWAYS smelt/cast in a well ventilated area. This means outdoors. Most casters also use a fan placed behind them to blow the fumes away. This is advisable. Some wear respirators. 3.) Molten lead is H-O-T. If smelting or casting, be aware of your surroundings and be sure to set up on a STURDY table. Casting can be messy, so your brand new dining room table is not an option. 4.) Casting takes concentration and is usually done best alone. Kids, dogs, wives/husbands running around your casting table = bad. 5.) Water and lead do not mix. If water is introduced to lead in its molten state, you will more than likely get burnt. It is kind of like a little napalm bomb…quite the violent reaction. So if you decide to water drop you bullets, make sure the bucket is away from your casting pot. 6.) Anything you stick in your pot will get hot…and it will get hot FAST. If it does not have a wooden handle, you need to wear hand protection. When smelting, hand protection is must. When you take a tool out of the pot and think it is cool, it probably isn’t (thermometers, ladles, etc.). Stuff stays hot for quite a while…ESPECIALLY molds. 7.) Proper clothing is also important. Long sleeves, long pants, and leather boots is a must. Cover all exposed skin. Some people wear aprons. If you accidentally spill your pot, you will wish you were not wearing those sandals! Following these safety precautions will make casting 100% safe and more enjoyable.
Smelting
There are many ways you can smelt wheel weights into ingots. Some people will use a Coleman stove, turkey burner or bottom pour pot for a few examples. If you use a bottom pour pot I would suggest buying two, one for smelting and one for casting because the smelting pot will get very dirty. The easiest way I found for myself is to use a turkey burner. I bought a Bayou Classic 185,000 BTU burner for $45 and a six quart cast iron dutch oven at Harbor Freight for $12. I use a RCBS casting thermometer so I can keep the melt around 700 degrees or a little less, that keeps the zinc weights from melting.
I bought a 20” slotted spoon to scoop the clips and a 24” solid spoon to skim the dross, for $3 each at the restaurant supply store. I use old one gallon bean cans to dump the clips and dross into to let cool. I bought a Rowell #3 ladle to pour the ingots, it cost around $30 and will hold four pounds of lead. I use wax to flux with, any old candles will do. You can also use saw dust or old bullet lube, be careful it doesn’t take much. I use an old wooden shovel handle that broke to stir with. As the wooden handle chars it helps to flux the melt.
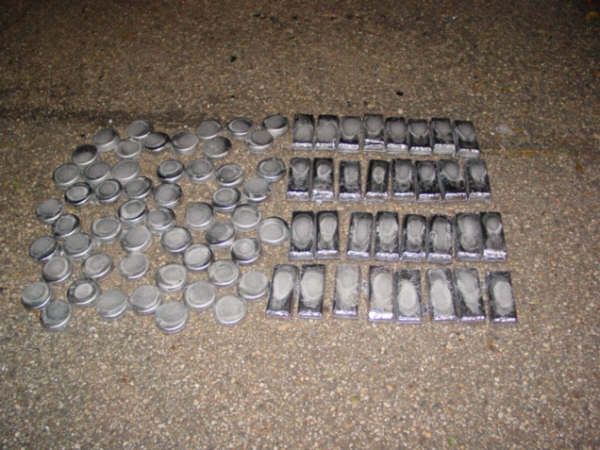
I made some ingot molds by cutting 3” channel into 6” long pieces and welding angle on the ends. My wife bought me a couple of cast iron muffin pans. The muffins won’t fit into a Lee 10# pot but the bars will if only filled half way. You can also use the heavy aluminum muffin pans from Wal-Mart or another store. Don’t use any pans that are tin coated because the ingots will stick and not come out.
This is my smelting process from start to finish.
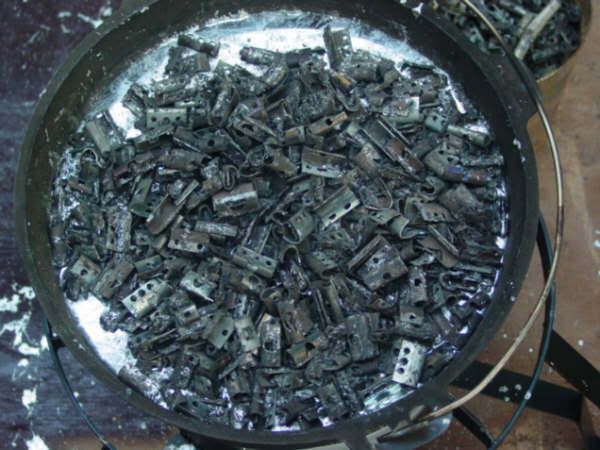
1:Fill the pot with WW’s. Put the lid on the pot and turn on the gas to melt them.
2: At 700 degrees scoop out the clips and any zinc or steel weights that will be floating with the clips with the slotted spoon.
3: Fill the pot again, cover and let melt. That will give me a full pot. Doing it this way I can fit almost a full cat litter bucket of WW’s in one six quart pot.
4: At 700 degrees scoop out everything floating again.
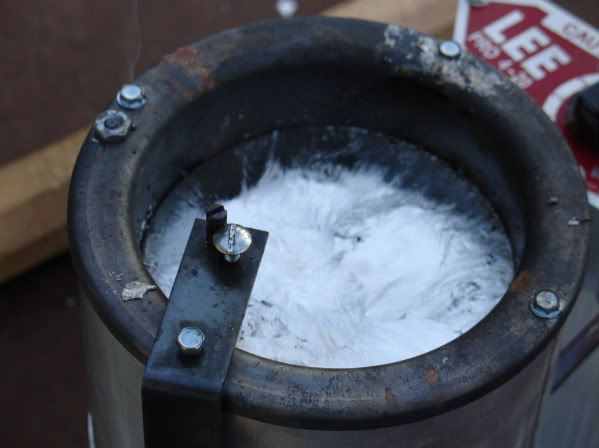
5: Now I add around a one inch cube of wax. It will melt and when it starts to smoke it will catch fire. When the fire burns down a little I start to stir with the shovel handle. I will stir scraping the sides and bottom of the pot for a few minutes.
6: After stirring all of the crap starts to float to the top. Now I will take the solid spoon and start skimming the dross. If you want you can flux a second time.
7: Now with clean lead you can pour the ingots. I will fill all of my molds. When they are full I will start to dump them in the order they were filled. Then I fill them again. When you run out of lead the fun starts all over again.
Bullet Casting
Here is a quick list of casting equipment: lead, pot, heat source, boolit mold, wood stick (about 1.5” x9 or 10” long), soft towels, ladle, spoon (for scooping out dross), bucket of water (if you prefer to water drop bullets), coffee can or equivalent (place to put dross), and flux (sawdust, stick bullet lube, commercially available flux, etc).
To begin my casting session, I load my pot with lead ingots, neatly stacking them no higher than the top of the pot. I then turn my Lee pot on full blast. As the original ingots melt, more can be added if necessary. Do this carefully so you don’t splash lead on yourself. Place your mold(s) you will be using on the edge of the pot to preheat them. If you are a beginner, now is the time to put your thermometer into the pot to get your temperature dialed in. For wheel weights, I prefer to cast around 750 degrees. You may find that you have better luck running it a little hotter or even maybe a little cooler.
Once my pot is at my desired temperature, I flux the metal. I use Lee bullet stick lube. Just a small piece, about the size of a pea is good for 5-10 pounds of lead. Once this is added, your pot will smoke and possibly begin to flame. This is natural, and I actually prefer it because if there is a flame, there is no smoke. Try not to breath the smoke (this is where the fan comes in play…). Stir your pot, making sure to scrape the sides. I stir for about a minute, vigorously, but not too fast to splash lead. You will see dross float to the top. This can be scooped out and discarded.
Now you are ready to pour some boolits (at this point I am assuming you have prepared your mold per the manufacturer‘s specifications…ie cleaning, lubing, etc).
There are 2 main types of pots. Pots that require you to use a ladle, and pots that have a spout on the bottom of the pot. The latter are called bottom-pour pots. The bottom pour pots have a handle that you raise to start the flow of lead. When the handle is lowered, the flow stops. They are easier to use, but some people swear by the time-tested ladle technique.
Take your preheated mold and close the mold blocks together making sure they are aligned properly. Then close the sprue plate. If you are using the ladle technique, preheat you ladle for a couple seconds, then take a generous scoop of lead. Quickly pour the lead through the holes in the sprue plate and into the cavity. Be sure to fill the cavity completely and leave a generous pool of lead on top of the sprue plate. This ensures that the cavity is full. Do this step over the pot so your overflow goes back into the pot.You will notice that the lead pool will “frost over” within a couple seconds. Once this happens, take your wooden stick and whack the tip of the sprue plate, which will cut off the sprue. Let the sprue fall on the table.
Do not do this over the pot because you will splash lead on yourself. (I knock mine off into a coffee can so it is easy to pour back in the pot.). Open your mold over a soft towel. If your bullet do not drop out, tap the bolt that connects your molds handles. NEVER tap the mold blocks, as this could throw them out of alignment. That’s all there is to it. Close your mold and sprue plate and keep pouring. You may find that if you prematurely cut the sprue when the lead is not cooled enough, you will gall the bottom of the sprue plate and the top of the mold blocks. This is should be avoided and will requiring some cleaning. As your mold heats up, it will require more time for the sprue to frost over.
As your mold heats up, you may find your boolits coming out and cooling with a frosty look to them. This is due to the mold being to hot. Now would be a good time to flux the pot again and give the mold time to cool (I flux maybe every 10 minutes or so…or whenever I feel it needs it. Anytime you add lead to your pot, it is recommended that you flux). Some people like to have a wet sponge handy to cool their molds as they are casting. Depending on your molds, you may find that you need to touch the bottom of the mold to the damp sponge for 2-3 seconds every couple casts to keep your mold producing non-frosted boolits. When you cool your mold with this technique, make sure you cool it with the boolits in the mold. Frosted boolits shoot just as well as non-frosted….so don’t be so quick to reject them.
Some people prefer to water drop their boolits. Simply put, this is when the boolits are dropped from the mold into a bucket of water. This makes your boolits much harder than those that are air-cooled, AKA air-dropped. Depending on the velocities you intend to push your boolits to will help you determine which technique is best. One other tip…never drop your reject boolits from the mold directly back into the pot. You run the risk of having a splash of lead stick in between your mold blocks, causing them to not close properly, which will produce even worse looking boolits than the ones you just rejected.
Lubing and Sizing
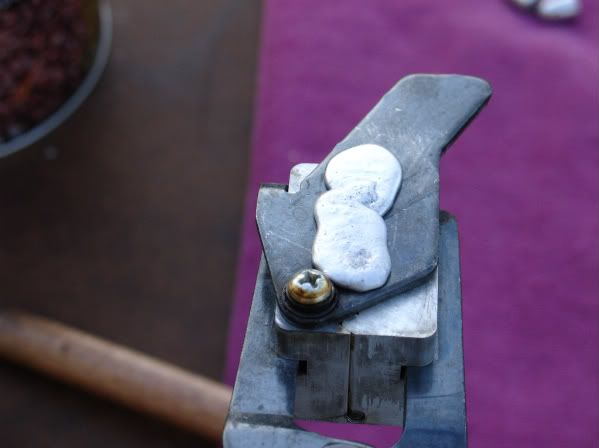
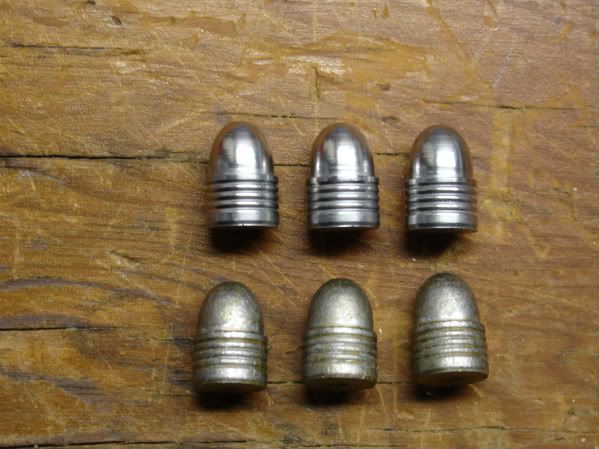
The bullets should be lubed and sized before loading. For the sake of keeping it simple, I will tell you how I size and lube my boolits. There are many techniques out there and you will find the one that suits you best. I use Lee Liquid Alox to tumble lube my boolits. I put about 100 boolits in an old ice cream tub, apply about 12-15 drops of lube and tumble them around in the tub, using a swirling motion. Make sure all the bullets are covered. Once covered, pour them out on a piece of wax paper and let the dry OVER NIGHT. The following day I run them through my sizer to ensure they are all exactly the same diameter. After running them through my sizer, I like to apply another THIN coat of lube and let them dry over night…again. Now they are ready to load. You may need to adjust your flaring die to put a LITTLE more flare on the case for these boolits. You do not want lead shavings when seating the boolits. This pic is of unlubed (top) and lubed boolits (bottom).
Due to the limitations of this forum I can only use 6 images in this post. If you need more pictures for clarification, please let me know. Thanks!